Introduction
Illuminance measurement is widely used in offices, schools, hospitals, factories, warehouses, commercial buildings, laboratories, photography environments, agricultural lighting applications, and building lighting inspections.
In practice, measuring illuminance with a digital lux meter is relatively straightforward: place the illuminance sensor at the required measurement position, allow the instrument reading to stabilize, and record the value in lux.
However, a simple operating procedure does not mean that measurement details can be ignored.
Even when the same lux meter is used in the same space, significant differences in measured illuminance may occur if the measurement position, height, sensor angle, or operator position changes.
For example:
● The sensor is not positioned level with the measurement plane;
● The measurement position does not represent the actual working plane;
● The operator stands between the light source and the sensor;
● Readings are taken immediately after the lighting is switched on;
● Daylight conditions change during the measurement;
● Nearby walls or objects produce strong reflections;
● Different measurement methods are used at different measurement points;
● Site conditions are not recorded after the measurement.
These factors can affect the accuracy, repeatability, and comparability of illuminance measurement results.
For building lighting inspections, project acceptance, workplace illuminance assessment, and professional lighting-environment testing, it is therefore important to establish a consistent and standardized measurement method.
This article explains the main factors that should be considered during illuminance measurement and provides a practical basic procedure for on-site testing.
Key Takeaways
After reading this article, you will understand:
● What preparations should be made before measuring illuminance;
● Why measurement position and height are important;
● How an illuminance sensor should be positioned;
● How to prevent the operator from blocking incident light;
● Why the light source and measuring instrument should be allowed to stabilize;
● How reflections and daylight can affect measurement results;
● What should be considered when measuring LED lighting;
● How multi-point illuminance measurements should be performed;
● How to improve comparability between different measurement results;
● Common mistakes made during illuminance measurement;
● How to establish a more standardized illuminance measurement procedure.
Why Does the Measurement Method Affect Illuminance Results?
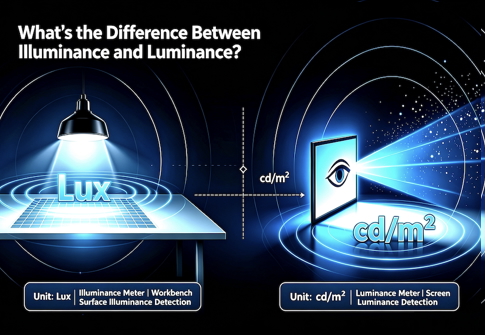
Illuminance is the amount of luminous flux received per unit area of a surface. Its SI unit is the lux (lx).
Illuminance is not a fixed value that remains identical throughout an entire space. Even within the same room, the illuminance level can vary considerably from one location to another.
For example:
● The area directly beneath a luminaire is often brighter than the area between luminaires;
● Locations near windows may receive significant amounts of daylight;
● Areas close to walls may be influenced by reflected light;
● Illuminance on a workbench may differ from illuminance at floor level;
● Luminaire height, beam angle, and obstructions can all affect local illuminance.
Illuminance measurement therefore essentially answers the following question:
“How much light is actually received at a specified position, on a specified plane, under specified environmental conditions?”
If these conditions are not kept consistent, different operators may obtain different measurement results even when the measuring instrument itself is functioning correctly.
What Should Be Checked Before Measuring Illuminance?
Define the Purpose of the Measurement
Before starting, clearly define the purpose of the test. Different measurement objectives may require different measurement positions and procedures.
Common measurement purposes include:
● Illuminance measurement on office work surfaces;
● Illuminance measurement on classroom desks or blackboards;
● Lighting assessment in factory work areas;
● Illuminance measurement in warehouse aisles;
● Acceptance testing for building lighting installations;
● Lighting assessment in commercial spaces;
● Laboratory workbench illuminance measurement;
● Supplementary evaluation of horticultural lighting environments;
● Illuminance comparison before and after luminaire installation;
● Comparison of lighting performance before and after energy-efficiency upgrades.
Only after the measurement objective has been clearly defined can the appropriate measurement plane, measurement height, and measurement-point locations be determined.
Check the Condition of the Lux Meter
Before formal measurement begins, confirm that the digital lux meter is operating correctly.
It is recommended to check the following:
● The battery has sufficient charge;
● The optical sensor surface is clean;
● The sensor is free from scratches, contamination, or obstruction;
● The instrument powers on and displays normally;
● The correct measurement unit, such as lux or foot-candles, is selected;
● Automatic or manual ranging is set correctly;
● The Data Hold function is not unintentionally activated;
● There are no low-battery or over-range indications;
● The calibration status is appropriate for the measurement task.
For engineering acceptance, quality inspection, laboratory testing, or applications requiring measurement traceability, the instrument's calibration status should be verified in accordance with the organization's quality system, inspection procedure, or other applicable requirements.
Keep the Sensor Surface Clean
Lux meters typically use an optical sensor to receive incident light.
Dust, oil, fingerprints, water droplets, tape, protective film, or other contaminants on the sensor surface may alter the amount of light reaching the detector and affect the measurement result.
The sensor surface should therefore be inspected before measurement.
Cleaning should be carried out in accordance with the instrument manufacturer's recommendations. Avoid materials or cleaning methods that could damage the diffuser, optical filter, or sensor surface.
Why Is Measurement Position So Important?
Measure on the Actual Working Plane
Illuminance is closely related to the measurement position. Measurement points should therefore represent the actual area or working plane being evaluated as closely as possible.
Typical examples include:
| Application | Typical Measurement Plane |
|---|---|
| Office | Desk or working surface |
| Classroom | Student desk surface |
| Factory | Actual operating or machining surface |
| Laboratory | Laboratory workbench |
| Warehouse | Aisles or areas used for identifying goods |
| Commercial space | Product display or primary activity area |
| Healthcare facility | Relevant examination or working surface |
| Public area in a building | Determined according to the actual use of the space |
If the purpose is to evaluate desk-level illuminance but the sensor is placed on the floor, the reading may be technically valid for the floor position, but it will not accurately represent the lighting conditions on the actual working plane.
Do Not Change the Measurement Height Arbitrarily
Illuminance normally changes when the distance between the light source and the measurement plane changes.
When comparing multiple locations within the same project, the same measurement height and reference plane should therefore be maintained.
This is particularly important when performing:
● Before-and-after renovation comparisons;
● Comparisons between different luminaires;
● Illuminance-uniformity evaluations across different areas;
● Repeated measurements over time.
Consistent measurement conditions help ensure that the resulting data remain comparable.
How Should the Illuminance Sensor Be Positioned?
Maintain the Correct Sensor Orientation
For illuminance measurements on a horizontal working plane, the sensor's light-receiving surface should normally be aligned with the plane being evaluated.
When measuring a horizontal desk surface, avoid:
● Tilting the sensor noticeably forward;
● Tilting it backward;
● Tilting it sideways;
● Continuously changing its angle while holding the instrument.
Changing the sensor angle changes the way incident light reaches the detector.
For lighting coming predominantly from above, greater sensor tilt may result in a larger deviation from the intended measurement condition.
Do Not Point the Sensor Directly at the Luminaire
Measuring ambient illuminance is not the same as measuring the light source itself.
For example, when measuring illuminance on an office desk, the sensor should simulate the way the desk surface actually receives light. It should not be deliberately pointed toward a particular luminaire.
The correct measurement target is:
The illuminance actually received by the specified working plane.
The objective is not to obtain the highest possible reading on the instrument.
Consider the Sensor's Cosine Response
Professional lux meters are generally designed to compensate for light arriving at different incident angles through cosine correction.
In a real lighting environment, light may arrive from multiple directions. An illuminance sensor should therefore respond appropriately not only to perpendicular light, but also to obliquely incident light.
This is one reason why professional illuminance measurements should be performed with an optical sensor specifically designed for lux measurement rather than with a general-purpose light-sensitive element.
Avoid Blocking Light With the Operator's Body
This is one of the most common errors in on-site illuminance measurement.
Do Not Stand Between the Light Source and the Sensor
If the operator is positioned between a luminaire, window, or other major light source and the sensor, the operator may cast a shadow.
Even when the shadow is not visually obvious, it may reduce the amount of light reaching the sensor.
When taking readings, avoid:
● Blocking the luminaire with the body;
● Blocking the sensor with an arm or hand;
● Positioning the head between the light source and the sensor;
● Allowing clothing or equipment to obstruct daylight;
● Having several people gather around the measurement point.
A Separate Sensor Can Help Reduce Interference
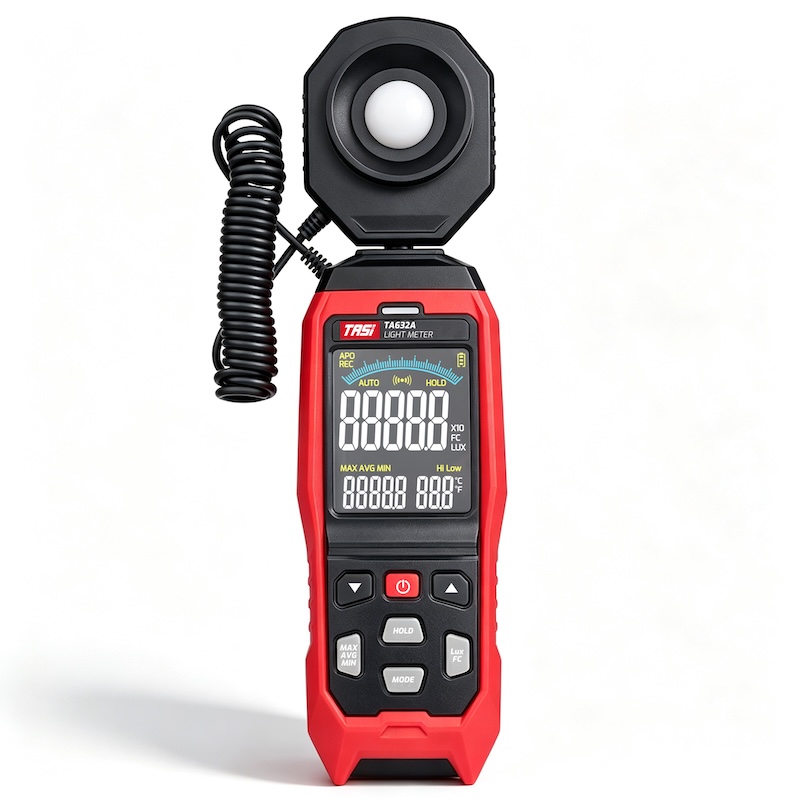
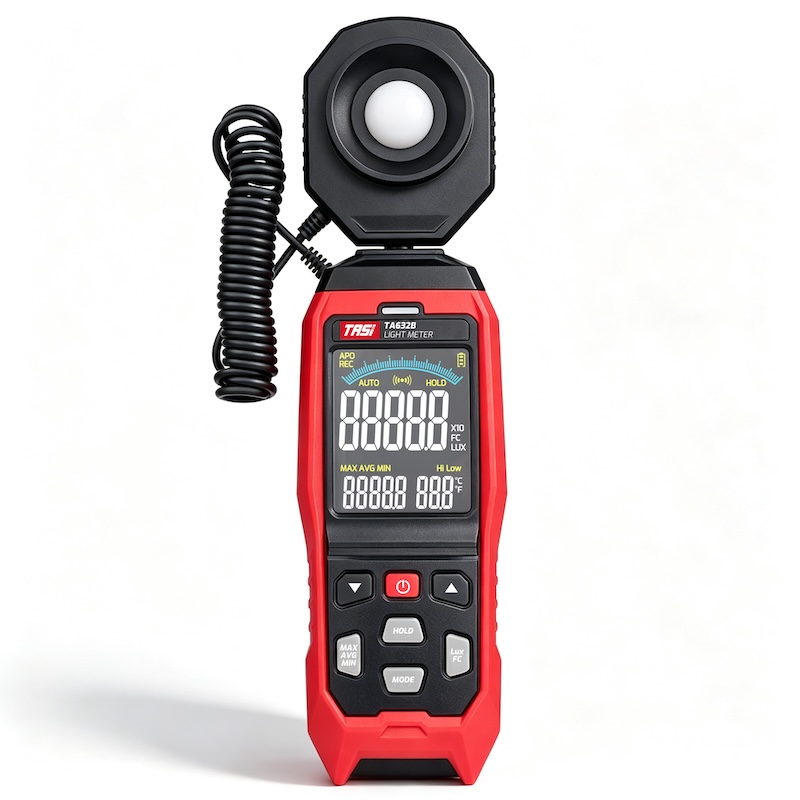
With a digital lux meter featuring a separate light sensor, the sensor can be positioned independently on the measurement plane while the operator remains at a greater distance.
This can help reduce the effects of:
● Body shadowing;
● Changes in sensor angle caused by handholding;
● Variations in operator position.
As a result, the measurement can be more consistent.
Allow the Light Source to Stabilize Before Measurement
Do Not Measure Immediately After Switching the Lighting On
Some light sources require a certain period of operation before their output becomes stable.
If illuminance is recorded immediately after switching the lighting on, the measured value may not represent normal steady-state operation.
Before formal measurement, determine whether warm-up or stabilization time is required based on:
● The type of light source;
● The luminaire manufacturer's instructions;
● The project testing procedure.
Check the Operating Condition of the LED Driver
LED lighting is widely used in modern buildings.
The output of an LED luminaire depends not only on the LED light source itself, but also on the driver, dimming settings, and lighting-control system.
Before measurement, confirm that:
● The luminaires are operating normally;
● The dimming level remains unchanged;
● The smart lighting system is not automatically adjusting the output;
● Occupancy or motion sensors are not changing the lighting level;
● Daylight-harvesting controls are not automatically changing the luminaire output.
Otherwise, measurements taken at different times may differ even when the sensor is placed at exactly the same position.
Wait Until the Lux Meter Reading Is Stable Before Recording It
After positioning the sensor at the measurement point, avoid recording the first value that appears on the display.
A recommended procedure is:
1、Place the sensor at the specified measurement position;
2、Keep the position and orientation stable;
3、Wait until the displayed value stabilizes;
4、Record the final measurement result.
If the light level fluctuates slightly, observe the reading for an appropriate period and, depending on the measurement objective, record the stable value, average value, maximum value, or minimum value.
If the instrument provides AVG, MAX, MIN, or data-logging functions, these can also be used as appropriate for the measurement task.
Check the Measurement Range and Unit
Use the Correct Measurement Unit
The most common units of illuminance are lux (lx) and foot-candles (fc).
Lux is more widely used in international engineering, building lighting, and most technical applications.
If the project requires measurements in lux, confirm that the instrument has not accidentally been set to foot-candles.
Select an Appropriate Range on Manual-Ranging Instruments
Some digital lux meters use automatic ranging, while others also allow manual range selection.
When using manual ranging:
● A range that is too low may result in an over-range indication;
● A range that is unnecessarily high may reduce the displayed resolution.
The appropriate range should therefore be selected according to the expected illuminance level.
If the approximate lighting level is unknown, begin with a higher range and gradually switch to a more suitable lower range where necessary.
Consider the Effect of Environmental Reflections
An illuminance sensor does not receive only the direct light emitted by luminaires. In a real environment, a substantial amount of reflected light may also reach the measurement plane.
Common sources of reflected light include:
● White walls;
● Ceilings;
● Floors;
● Glass curtain walls;
● Metallic equipment surfaces;
● Light-colored work clothing;
● High-reflectance work surfaces.
Reflected light is part of the actual lighting environment and should not automatically be considered “incorrect” or unwanted light.
However, when comparing different locations, lighting schemes, or measurement periods, surrounding conditions should be kept as consistent as reasonably possible.
For example, if a workbench is empty during the first measurement but covered with a large white material during the second, the surrounding reflectance conditions have changed and the two sets of measurements may no longer be directly comparable.
What Should Be Considered When Daylight Is Present?
Daylight Changes Continuously
Near windows, glass façades, and open areas, indoor illuminance may be influenced by both electric lighting and daylight.
Daylight can change continuously due to:
● Time of day;
● Solar altitude;
● Cloud cover;
● Weather conditions;
● Curtain or blind position;
● Obstructions from surrounding buildings;
● Seasonal conditions.
When measuring illuminance in an area with significant daylight, first determine:
Are you measuring electric lighting only, or the actual combined lighting condition including daylight?
Keep Daylight Conditions Consistent During Comparative Tests
If the purpose of the measurement is to compare:
● Lighting before and after luminaire replacement;
● Lighting before and after an energy-efficiency upgrade;
● Two different lighting designs;
daylight variation should be prevented from becoming a major source of uncertainty.
Depending on project requirements, consider:
● Performing measurements when daylight influence is limited;
● Keeping blinds or shading systems in the same position;
● Measuring at similar times and under similar weather conditions;
● Recording electric-light-only and combined-lighting conditions separately.
Most importantly, the actual site conditions should be clearly documented in the measurement record.
What Should Be Considered When Measuring LED Lighting?
LED lighting has become one of the primary lighting technologies used in offices, factories, schools, commercial buildings, and public facilities.
In addition to the general requirements for illuminance measurement, LED lighting requires particular attention to spectral characteristics and light-output stability.
Different LED Spectra May Affect Instrument Response
Ideally, a lux meter should approximate the photopic spectral sensitivity of the human eye, commonly represented by the V(λ) function.
However, spectral matching performance differs between lux meters.
When measuring:
● LEDs with different correlated color temperatures;
● Colored LEDs;
● RGB light sources;
● Narrow-spectrum light sources;
different instruments may produce somewhat different readings.
For higher-accuracy professional measurements, the spectral-response characteristics and relevant performance specifications of the lux meter should therefore be considered.
Pay Attention to LED Dimming and Flicker
Some LED luminaires use PWM or other control methods for dimming. Their instantaneous light output may therefore fluctuate periodically.
Conventional illuminance measurement generally focuses on the effective lighting level over a certain period. However, when substantial light-output modulation is present, different instruments may display different values because of differences in sampling rate and signal-processing methods.
If the purpose of the test is to evaluate:
● LED flicker;
● Modulation depth;
● Flicker percentage;
● Flicker frequency;
a standard digital lux meter generally cannot replace dedicated flicker-analysis equipment.
Do Not Rely on a Single Measurement Point
In larger spaces such as offices, classrooms, factories, and warehouses, a single measurement point is usually insufficient to represent the lighting conditions of the entire area.
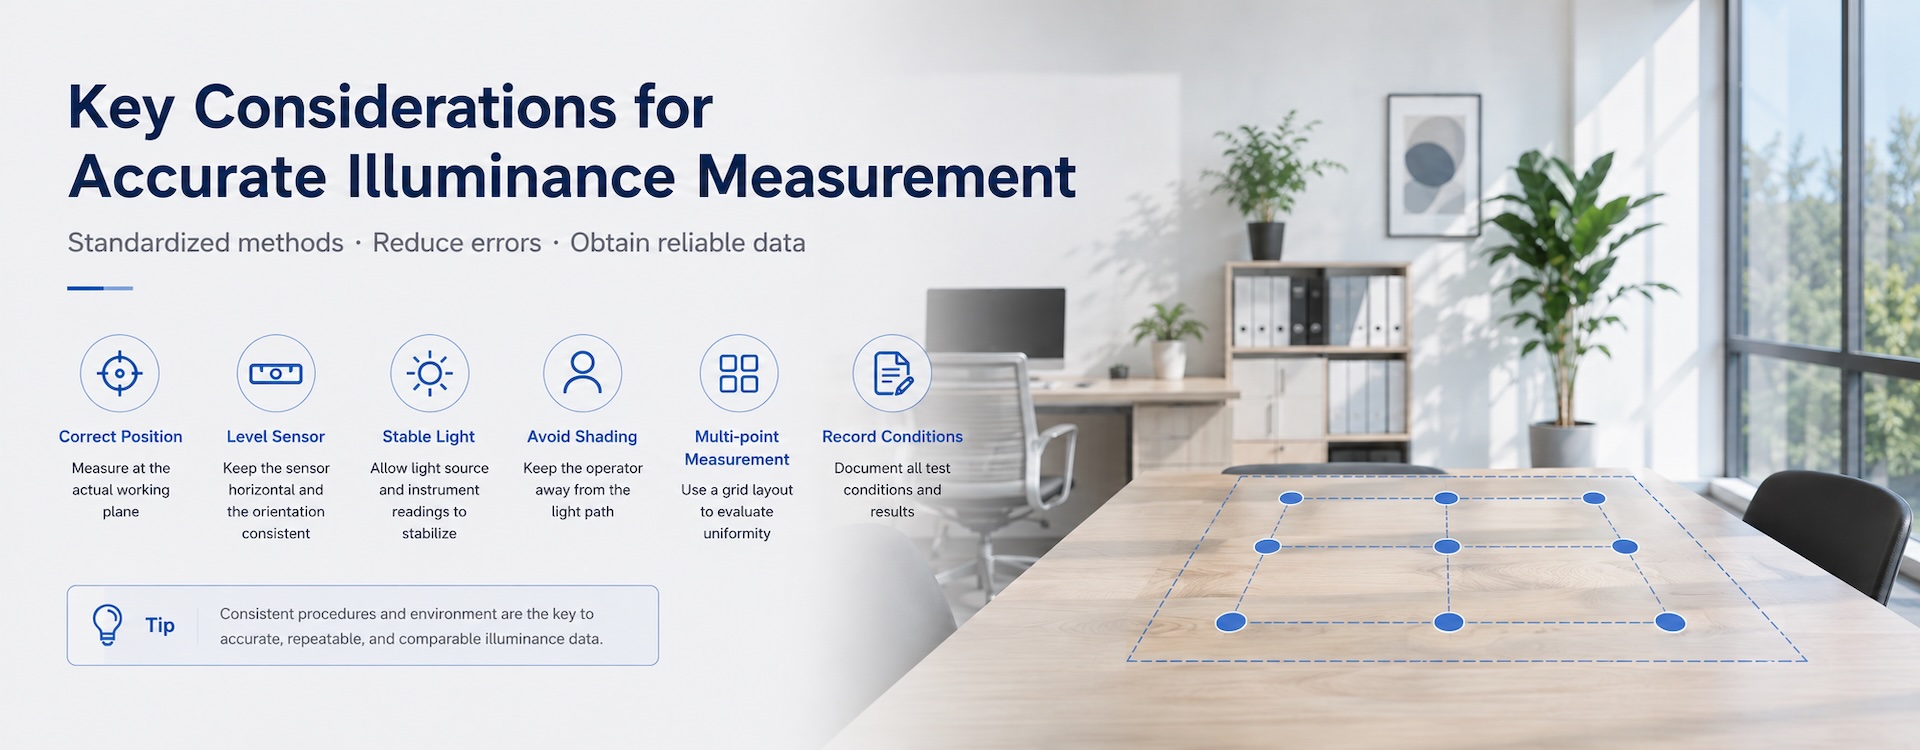
Use Multiple Measurement Points
Depending on the size of the space and the project requirements, several measurement points may be arranged across the area.
For example, a regular measurement grid may be used:
| Measurement Point | Illuminance |
|---|---|
| P1 | 485 lx |
| P2 | 510 lx |
| P3 | 462 lx |
| P4 | 498 lx |
| P5 | 476 lx |
Multiple measurement points can provide additional information about:
● Average illuminance;
● Maximum illuminance;
● Minimum illuminance;
● Spatial illuminance distribution;
● Local areas that are excessively bright or too dark;
● Lighting uniformity.
Measurement Points Should Be Representative
Measurement points should not be selected only directly beneath luminaires or at visually brightest locations.
Otherwise, the final result may not accurately represent the actual lighting conditions across the space.
For formal assessment projects, the measurement grid and measurement locations should be determined in accordance with the applicable testing procedure, design requirements, or relevant lighting standards.
Use a Consistent Method at Every Measurement Point
When performing multi-point measurements, the procedure should be kept as consistent as possible at all measurement points.
This includes maintaining:
● The same measurement height;
● The same sensor orientation;
● The same instrument settings;
● The same stabilization period;
● The same operator-positioning principles;
● The same light-source operating condition;
● The same data-recording method.
Consistency is important for improving the repeatability of the measurement results.
Repeatability can be understood simply as:
Whether repeated measurements under the same conditions produce similar results.
If different procedures are used at each measurement point, it can be difficult to obtain truly comparable data even when a high-accuracy lux meter is used.
Repeat Measurements When Necessary
In professional illuminance testing, a single unexpected reading should not automatically be accepted as final.
If the reading at a particular measurement point is:
● Significantly higher than surrounding locations;
● Significantly lower than surrounding locations;
● Continuously fluctuating;
● Substantially different from the expected value;
recheck the following:
● Sensor position;
● Sensor angle;
● Possible obstruction;
● Reflections;
● Luminaire operating condition;
● Instrument settings.
For important data, multiple measurements may also be taken and averaged to reduce the influence of random variation.
Do Not Use Data Hold Indiscriminately During Measurement
Data Hold is a common function on digital lux meters.
It freezes the current display value so that the reading can be recorded more easily.
However, Data Hold does not improve measurement accuracy.
If the HOLD button is pressed before the reading has stabilized, the instrument will simply freeze an unstable value.
The recommended sequence is:
Position the sensor → Wait for the reading to stabilize → Press HOLD → Record the value.
Why Should Illuminance Measurement Results Be Properly Recorded?
Illuminance data have limited value for later analysis if they are separated from the conditions under which the measurements were obtained.
For example, recording only: 485 lx
does not fully describe the lighting conditions at the time of measurement.
A more complete measurement record should normally include:
| Item | Recommended Information |
|---|---|
| Measurement date | Specific date of measurement |
| Measurement time | Time or measurement period |
| Measurement location | Building, room, or area |
| Measurement position | Measurement-point identification |
| Measurement height | Sensor height or working plane |
| Illuminance | Measured value in lux |
| Lighting condition | Fully on, partially on, or dimmed |
| Daylight condition | Presence or absence of significant daylight |
| Instrument model | Lux meter used |
| Environmental conditions | Other relevant influencing factors where necessary |
| Abnormal conditions | Obstruction, reflection, luminaire abnormality, etc. |
For engineering acceptance, quality management, or periodic inspection, complete records make it easier to perform:
● Data verification;
● Trend comparison;
● Abnormality analysis;
● Maintenance assessment;
● Evaluation of lighting-upgrade results.
Why Can Different Lux Meters Produce Different Results?
Even when measurements are taken at the same location, different brands or models of lux meter may not display exactly the same value.
Factors that may contribute to differences between instruments include:
● Measurement accuracy;
● Spectral response;
● Cosine response;
● Sensor performance;
● Calibration status;
● Resolution;
● Sampling rate;
● Signal-processing method;
● Instrument aging.
For measurements that will be compared over an extended period, using the same instrument—or instruments with equivalent performance and consistent calibration status—can help improve comparability between different measurement sessions.
Common Mistakes During Illuminance Measurement
The following table summarizes some of the most common problems encountered during on-site measurement.
| Common Mistake | Possible Effect | Recommended Practice |
|---|---|---|
| Incorrect measurement position | Data do not represent the actual working plane | Measure on the required evaluation plane |
| Sensor is tilted | Changes the incident-light response | Maintain the specified orientation |
| Operator blocks the light | Measured value may be too low | Keep personnel away from major incident-light paths |
| Measuring immediately after switch-on | Light output may not yet be stable | Allow the light source to stabilize |
| Recording before the reading stabilizes | Poor measurement repeatability | Wait until the display is stable |
| Incorrect unit selected | Incorrect data interpretation | Confirm lux / fc |
| Incorrect range selection | Over-range or reduced resolution | Select an appropriate range |
| Only one point measured | Does not represent the whole area | Use multi-point measurement |
| Daylight ignored | Results from different times may not be comparable | Control and record daylight conditions |
| Sensor surface contaminated | Alters incoming light | Keep the sensor clean |
| Different method used each time | Difficult to compare data | Establish a consistent procedure |
| Site conditions not recorded | Difficult to verify results later | Maintain complete measurement records |
Recommended Standard Procedure for Illuminance Measurement
To improve the consistency of on-site illuminance measurement, the following procedure can be used.
Step 1: Define the Measurement Objective
Determine:
● Which area is being evaluated;
● Which working plane is being evaluated;
● Which lighting condition is required;
● Which lighting parameter or criterion is being assessed.
Step 2: Confirm the Measurement Conditions
Determine:
● Measurement time;
● Luminaire operating status;
● Dimming condition;
● Door and window status;
● Curtain or blind position;
● Daylight conditions.
Step 3: Check the Lux Meter
Confirm:
● Sufficient battery charge;
● Clean sensor;
● Correct measurement unit;
● Correct range setting;
● Normal instrument operation.
Step 4: Determine the Measurement Points
Select representative measurement locations according to the size of the area, the working zone, and the test requirements.
Step 5: Position the Sensor Correctly
Place the sensor on the specified working plane and maintain the correct orientation.
Step 6: Minimize Human Interference
Keep personnel away from the sensor where possible, and avoid blocking the light or significantly changing surrounding reflection conditions.
Step 7: Wait for the Reading to Stabilize
Observe the displayed value and record it only after the reading has stabilized.
Step 8: Complete Multi-Point Measurements
Use the same measurement method at every point.
Step 9: Recheck Abnormal Results
If a value appears abnormal, inspect the measurement conditions and repeat the measurement.
Step 10: Maintain a Complete Measurement Record
Record the measurement point, illuminance value, time, environmental conditions, and instrument information for subsequent analysis and traceability.
How Can the Reliability of Illuminance Measurements Be Improved?
Improving illuminance measurement reliability involves more than simply selecting a lux meter with higher stated accuracy. The entire measurement process should be controlled.
Key recommendations include:
● Use a digital lux meter suitable for the measurement requirements;
● Verify calibration or instrument status as required;
● Keep the optical sensor clean;
● Clearly define and maintain the same measurement plane;
● Keep the measurement position and height consistent;
● Maintain consistent sensor orientation;
● Prevent personnel from casting shadows over the sensor;
● Allow the lighting system to reach stable operation;
● Control environmental variables such as daylight;
● Use multi-point measurements instead of relying on a single reading;
● Repeat measurements when abnormal values are observed;
● Use a consistent measurement-record format.
For long-term monitoring or before-and-after comparisons, maintaining consistent test conditions is often more important than focusing on a single individual reading.
What Else Should Be Considered in Different Applications?
Office Illuminance Measurement
Focus on the actual desk-level working plane and measure multiple workstations rather than only locations directly beneath luminaires.
The effect of daylight near windows should also be considered.
Classroom Illuminance Measurement
Desks, teaching areas, and blackboards should be evaluated according to the object of the test, with representative measurement positions selected for each area.
Factory Illuminance Measurement
In addition to general ambient lighting, particular attention should be paid to equipment operating areas, assembly stations, inspection areas, and precision work zones.
Large machines may also create significant shadows, so measurements should reflect actual operating conditions where appropriate.
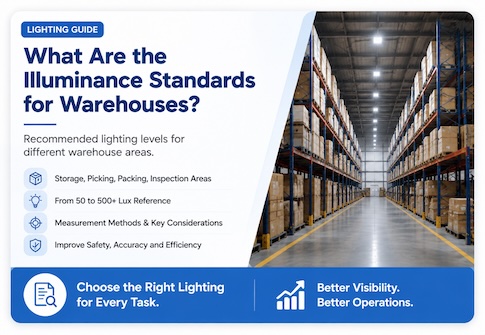
Warehouse Illuminance Measurement
Important areas include rack aisles, picking zones, label-reading areas, and loading or unloading zones.
Stored goods and shelving systems can also change the distribution of light.
Commercial-Space Illuminance Measurement
Display areas may include substantial accent lighting, reflective materials, and glass surfaces. Local differences in illuminance can therefore be significant, making multi-point measurement particularly useful.
Laboratory Illuminance Measurement
Laboratory workbenches and precision operating areas should be evaluated carefully, while the test environment and equipment arrangement should be kept consistent between measurements.
FAQ: Common Questions About Illuminance Measurement
Should the lux meter sensor be positioned horizontally during measurement?
For measurements on a horizontal working plane, the sensor's light-receiving surface should generally be aligned with the plane being evaluated. When measuring other types of planes, the sensor should be oriented according to the actual surface under assessment. The applicable testing procedure or project requirements should always take precedence.
Why do I get different lux readings at the same position on two separate measurements?
Possible causes include differences in sensor position, sensor angle, operator shadowing, daylight variation, light-source fluctuation, and instrument sampling behavior. Keep the measurement position, orientation, and environmental conditions as consistent as possible, and record the value only after the reading has stabilized.
Can a person stand next to the lux meter during measurement?
Yes, provided that the person does not stand between the primary light source and the sensor. If the operator creates a shadow or significantly changes the local reflection conditions, the measurement may be affected.
Can illuminance be measured immediately after the lights are switched on?
Not necessarily. Some light sources or lighting systems require a certain period to reach stable output. For professional measurements, the required stabilization time should be determined according to the light-source characteristics, manufacturer's instructions, or applicable project procedure.
Why does illuminance near a window change so much?
Areas close to windows are often strongly affected by daylight, which changes with weather, cloud cover, solar position, and time of day. For comparative testing, daylight conditions should therefore be controlled or carefully documented.
Is one lux measurement enough for an entire room?
For larger spaces, a single measurement point is generally not sufficient. One reading cannot adequately represent the lighting distribution across the whole room. Multiple representative measurement points should be selected according to the purpose of the assessment.
Does a lux meter need regular calibration?
For engineering acceptance, quality management, laboratory testing, or applications requiring measurement traceability, an appropriate calibration or verification program should be established in accordance with organizational requirements, the instrument manufacturer's recommendations, and applicable testing procedures.
Can lux and foot-candles be compared directly?
Both are units of illuminance, but their numerical scales are different. To avoid confusion, the same specified unit should be used throughout a measurement project. Lux is widely used in international engineering and lighting applications.
Is measuring LED lighting the same as measuring conventional lighting?
The basic principles are similar: measurement position, sensor orientation, and environmental conditions should remain consistent. However, LED lighting also requires consideration of spectral characteristics, driver operation, dimming method, and possible light-output modulation.
Does a higher illuminance value always mean better lighting?
No. Lighting quality depends not only on illuminance but also on factors such as uniformity, glare, correlated color temperature, color rendering, flicker, and the actual visual task. Illuminance is therefore only one important parameter used to evaluate lighting performance.
Conclusion
Illuminance measurement may appear to be as simple as placing a lux meter at the required location and reading a value in lux. In practice, however, reliable illuminance testing requires careful control of several important factors.
The most important considerations include:
● Selecting the correct measurement position;
● Maintaining a consistent measurement height;
● Using the correct sensor orientation;
● Preventing the operator from blocking light;
● Ensuring that the light source is stable;
● Controlling daylight and other environmental variations;
● Using representative multi-point measurements;
● Maintaining a consistent procedure between measurements;
● Repeating measurements when abnormal results are observed;
● Recording measurement conditions and test data completely.
A digital lux meter provides objective quantitative data for lighting design, building inspection, engineering acceptance, industrial maintenance, and workplace lighting assessment. However, the instrument itself is only one part of the measurement process.
Only by combining an appropriate measuring instrument, a standardized measurement method, and consistent test conditions can users obtain illuminance data that are accurate, stable, repeatable, and meaningful for practical evaluation.
For professional inspection projects, the final measurement positions, measurement grid, and assessment method should also be determined in accordance with the applicable local lighting standards, testing procedures, and specific application requirements.