Introduction
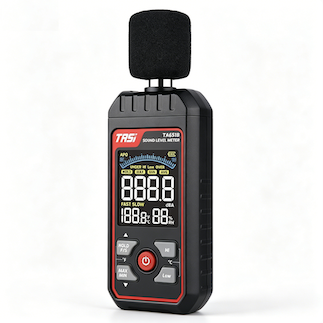
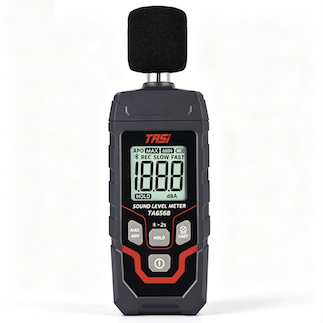
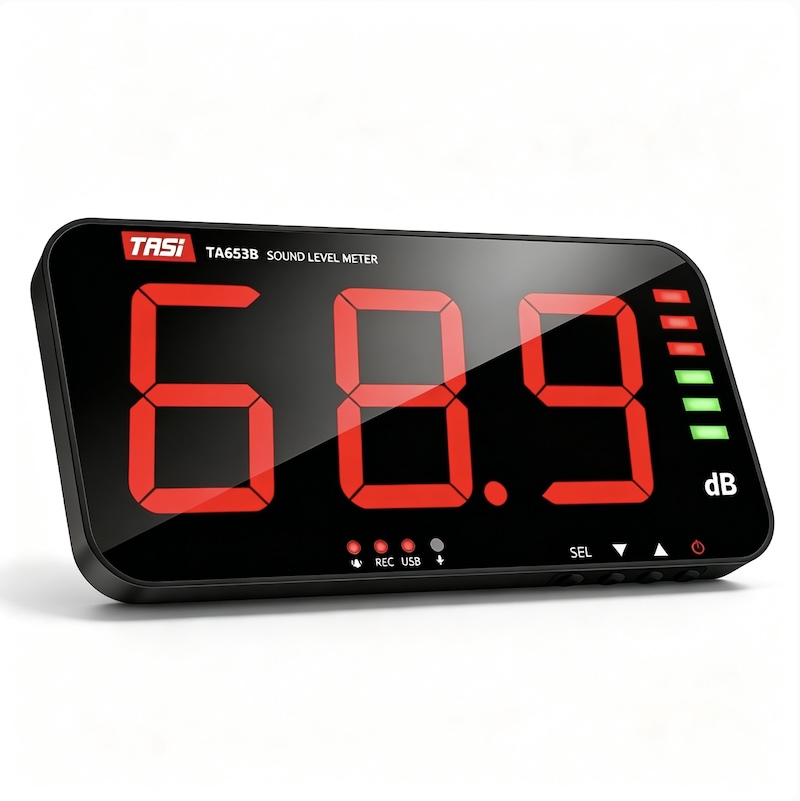
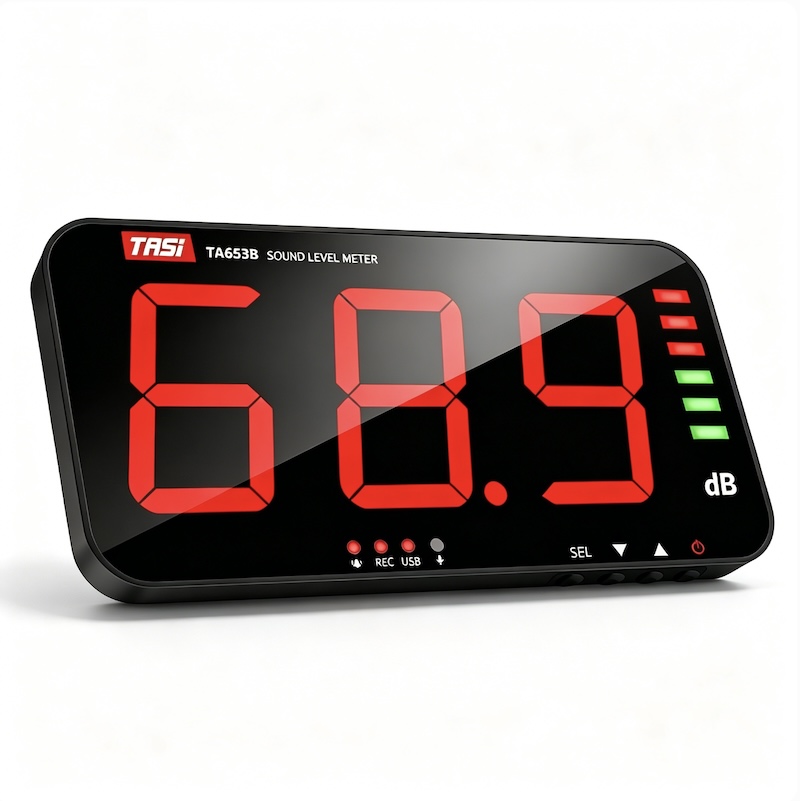
A sound level meter, sometimes referred to as a noise meter, is an instrument used to measure sound pressure level in the surrounding environment. The microphone converts acoustic pressure variations into electrical signals, which are then processed using frequency weighting, time weighting, and other signal-processing functions before the result is displayed in decibels (dB).
Even when the same instrument is used to measure the same sound source, different instrument settings, measurement distances, microphone orientations, or environmental conditions can produce different readings.
Correct sound level measurement therefore requires more than simply switching on the meter and reading the display. Reliable results depend on controlled measurement conditions and appropriate instrument settings for the intended application.
Key Points
● Check the meter, battery, microphone, and measurement range before testing.
● Select the appropriate A or C frequency weighting and FAST or SLOW time weighting for the application.
● Measurement position, distance, microphone orientation, and nearby reflective surfaces can affect the result.
● Minimize interference from the operator, walls, wind, and unrelated sound sources.
● Calibration is important for measurements requiring higher accuracy or formal documentation.
● For fluctuating sound, observe the level over an appropriate period instead of relying on a single instantaneous reading.
Check the Sound Level Meter Before Measurement
Before starting a measurement, confirm that the sound level meter is operating normally.
Inspect the instrument
Check the housing, display, and microphone for visible damage. A microphone that has been impacted, contaminated, or exposed to excessive moisture may affect measurement performance.
Check the battery
Low battery power may cause unstable operation. Make sure sufficient battery capacity is available before field measurements or extended monitoring.
Inspect the microphone
The microphone is one of the most important sensing components in a sound level meter. Avoid touching the microphone diaphragm and keep dust, moisture, and oil away from the microphone.
Verify instrument settings
Check the selected frequency weighting, time weighting, measurement range, and other relevant settings. Do not assume that settings left from a previous measurement are suitable for the next test.
Select the Appropriate Frequency Weighting
Sound level meters commonly provide different frequency weightings, with A-weighting and C-weighting being among the most widely used.
A-weighting
A-weighting is normally displayed as dBA or dB(A). It adjusts the measured response across different frequencies to approximate the frequency sensitivity of human hearing under typical conditions.
For this reason, A-weighting is widely used for general environmental noise, occupational noise, and routine machinery or equipment sound measurements.
C-weighting
C-weighting applies less attenuation to low-frequency sound than A-weighting. It is useful when stronger low-frequency content or relatively high sound levels need to be considered.
When comparing measurement results, always make sure the same frequency weighting has been used. A dBA reading should not normally be compared directly with a dBC reading as though they were equivalent.
Choose FAST or SLOW Time Weighting Correctly
Sound levels are rarely completely constant. Fans, motors, vehicles, machinery, and human activity can all cause the measured level to fluctuate.
Sound level meters therefore use time weighting to control how quickly the displayed level responds to changes.
FAST
FAST time weighting responds relatively quickly and makes short-term sound level variations easier to observe. It is useful when the purpose is to monitor rapidly changing sound.
SLOW
SLOW time weighting responds more gradually and generally produces a steadier display. It can make overall trends easier to observe when the sound level fluctuates.
For the same variable sound source, the displayed value may change rapidly in FAST mode while appearing more stable in SLOW mode.
When comparing measurements taken at different times or locations, use the same time weighting.
Select a Suitable Measurement Range
Some sound level meters require manual range selection, while others provide automatic ranging.
For instruments with manual ranges, choose a range appropriate for the expected sound level.
● If the sound level exceeds the upper limit of the selected range, an over-range indication may appear.
● If the sound level is significantly below the effective range, measurement performance may also be affected.
● If the approximate level is unknown, start with a higher range and adjust it after observing the reading.
A wider range is not automatically better. The objective is to keep the actual sound level within the valid operating range of the instrument.
Choose the Correct Measurement Position
Measurement position has a significant effect on sound level results. The same source measured at 1 metre and 5 metres can produce substantially different readings.
For measurements intended to be compared, keep the following conditions as consistent as possible:
● Distance between the sound level meter and the sound source.
● Microphone height.
● Microphone orientation relative to the sound source.
● Position relative to walls, floors, and large equipment.
● Operating condition of the equipment being measured.
When comparing noise from different machines, use the same measurement distance and similar environmental conditions whenever possible.
Hold and Position the Sound Level Meter Correctly
Place the microphone at the required measurement location and orient it according to the instrument manufacturer's recommendations.
Do not cover or obstruct the microphone with your hand.
When holding the meter, keep it reasonably away from the body to reduce acoustic shielding and reflection caused by the operator. For longer measurements or applications requiring better repeatability, mounting the instrument on a tripod is recommended.
Avoid positioning the meter immediately against a wall, machine enclosure, or other large reflecting surface unless the measurement procedure specifically requires it.
Maintain a Consistent Measurement Distance
For motors, fans, compressors, and other machinery, measured sound level changes with distance.
If the purpose is to compare different machines or monitor the same machine over time, establish a consistent measurement method, including:
● Measurement distance;
● Measurement position;
● Microphone height;
● Equipment operating mode;
● Measurement duration;
● Instrument settings.
This makes the resulting data more comparable.
A field sound level reading should not be treated as a single fixed “noise value” belonging only to the source. It is also influenced by distance, room geometry, reflections, and background sound.
Consider Reflections from Walls and Other Surfaces
Sound can reflect from walls, floors, ceilings, equipment housings, and other large surfaces.
If the microphone is placed too close to a reflective surface, the measurement may include both direct and reflected sound, producing a result that differs from measurements in a freer acoustic field.
For general field measurements, select the measurement position according to the purpose of the test and record relevant environmental conditions.
For repeated measurements at a fixed location, keep the surrounding environment as consistent as possible.
Consider the Effect of Wind
During outdoor measurements, airflow passing across the microphone can generate additional noise and may significantly influence the measured result, particularly at lower frequencies.
A suitable microphone windscreen can be used to reduce wind-induced noise.
However, a windscreen does not guarantee accurate measurement under all wind conditions. Strong wind, rain, or severe weather may exceed the intended operating conditions of the instrument.
Temperature, humidity, and other environmental conditions should also remain within the manufacturer's specified operating limits.
Reduce Interference from Unrelated Sound Sources
Field measurements often contain sound from multiple sources.
For example, when measuring a motor, nearby conversation, traffic, ventilation systems, air-conditioning equipment, or other machines may contribute to the total sound reaching the microphone.
Where possible, identify and reduce unrelated sound sources.
If background noise cannot be eliminated, record the background conditions and avoid interpreting the measured total sound level as though it were generated entirely by the target source.
Do Not Rely on a Single Instantaneous Reading
Many sound sources vary over time. Recording only one number from one moment may not provide a representative result.
For relatively stable equipment, wait until the displayed reading becomes reasonably steady before recording it.
For fluctuating sound, observe the level over an appropriate period. Depending on the instrument, useful parameters may include maximum, minimum, average, or equivalent continuous sound level.
If the meter provides only a basic sound level display, repeated measurements can still be useful provided the test conditions remain consistent.
When Should a Sound Level Meter Be Calibrated?
For basic trend checks, the first requirement is to ensure that the instrument is functioning normally.
For occupational noise assessment, environmental noise monitoring, quality control, laboratory testing, or other applications requiring higher accuracy, calibration becomes much more important.
A compatible acoustic calibrator is commonly used to verify the response of the sound level meter before measurement. For important measurements, a post-measurement calibration check can also be performed to confirm that no significant drift occurred during the test.
The sound level meter should also undergo periodic calibration according to the manufacturer's recommendations and the applicable quality-management requirements.
The acoustic calibrator must be compatible with the sound level meter and microphone. An unsuitable calibrator should not be used.
A Typical Sound Level Measurement Procedure
For a general machinery sound measurement, a practical sequence is:
● Check the sound level meter, battery, and microphone condition.
● Perform an acoustic calibration or calibration check when required.
● Switch on the meter and select an appropriate measurement range.
● Select A-weighting or C-weighting according to the test objective.
● Select FAST or SLOW time weighting.
● Define the measurement distance, position, and microphone orientation.
● Operate the equipment under the required operating condition.
● Allow the reading to stabilize or observe it for the specified measurement period.
● Record the sound level, measurement time, location, and instrument settings.
● Keep the same test conditions when comparing additional measurements.
● For important measurements, perform a post-measurement calibration check.
A consistent procedure greatly improves the comparability of measurements taken at different times, on different machines, or at different locations.
What Information Should Be Recorded?
Recording only “75 dB” is usually insufficient.
For better traceability, record:
● Measurement date and time;
● Measurement location;
● Sound source or equipment tested;
● Measurement distance and position;
● Frequency weighting, such as A or C;
● Time weighting, such as FAST or SLOW;
● Measured sound level;
● Equipment operating condition;
● Environmental conditions and significant background sound;
● Sound level meter model;
● Calibration information where applicable.
A complete record allows others to understand how the result was obtained and makes repeated testing and trend analysis more meaningful.
Common Sound Level Measurement Errors
Starting measurement without checking settings
Incorrect frequency weighting, time weighting, or range can make results difficult or impossible to compare.
Obstructing the microphone
Hands, the operator's body, or other objects close to the microphone can disturb the acoustic field.
Changing measurement position
Variations in distance, height, and orientation can change the reading even when the sound source itself has not changed.
Ignoring background noise
The meter measures the total acoustic energy reaching the microphone, not necessarily only the target source.
Ignoring wind during outdoor measurement
Airflow across the microphone can create substantial additional noise.
Recording only the highest instantaneous value
An isolated peak may not represent the complete measurement period.
Comparing all decibel readings directly
Results obtained with different frequency weighting, time weighting, locations, or environmental conditions should not be compared without considering those differences.
How to Improve Measurement Reliability
Reliable sound level measurement depends on controlling both the instrument and the measurement conditions.
Recommended practices include:
● Use a sound level meter suitable for the measurement requirement and in good operating condition.
● Select the correct frequency and time weighting.
● Keep the measured sound within the instrument's valid range.
● Maintain consistent position, distance, height, and microphone orientation.
● Reduce the effects of background noise and acoustic reflections.
● Consider wind and environmental conditions during outdoor testing.
● Perform calibration checks when measurement accuracy is important.
● Record the measurement conditions, not only the decibel value.
For repeat measurements, maintaining the same test conditions can be just as important as the specified accuracy of the instrument itself.
FAQ
Should I use dBA or dBC?
A-weighting, expressed as dBA, is commonly used for general environmental noise, workplace noise, and routine equipment sound measurements. C-weighting may be appropriate when stronger low-frequency components or specific high-level sounds need to be evaluated. The correct choice depends on the measurement objective.
Should I use FAST or SLOW?
FAST responds more quickly and is suitable for observing rapid sound changes. SLOW produces a steadier display and can make overall trends easier to monitor. Use the same setting when comparing measurements.
How far should the meter be from the sound source?
There is no universal distance for every application. The correct distance depends on the sound source, measurement objective, and test method. For repeated measurements, consistency and proper documentation of the distance are essential.
Why does the same machine produce different readings each time?
Possible reasons include changes in operating condition, measurement distance, microphone orientation, background noise, acoustic reflections, frequency weighting, time weighting, or environmental conditions.
Can I hold the sound level meter by hand?
Yes. Handheld measurement is suitable for many general field applications, but the microphone should not be obstructed. A tripod is preferable for long-duration tests or measurements requiring better repeatability.
Does a sound level meter always need calibration?
Requirements depend on the application. Routine trend measurements and formal assessments have different accuracy requirements. Occupational, environmental, laboratory, and other higher-accuracy measurements generally require appropriate calibration and calibration checks.
Does a microphone windscreen affect the measurement?
A suitable windscreen is designed primarily to reduce wind-induced noise. For precision measurements, use an accessory compatible with the microphone and follow the manufacturer's recommendations.
Conclusion
Correct use of a sound level meter requires control of both instrument settings and measurement conditions.
Select the appropriate frequency weighting and time weighting, verify the measurement range, define the microphone position, distance, and orientation, and minimize interference from wind, reflecting surfaces, the operator, and unrelated background sound.
For repeatable measurements, keep the equipment operating condition, test position, and instrument settings consistent and document the measurement conditions carefully. Where higher accuracy is required, appropriate calibration procedures should also be used.
Only when the measurement method and conditions are clearly defined can decibel readings provide reliable, repeatable, and meaningful information.